Creating a Website
Overview
Quarto Websites are a convenient way to publish groups of documents. Documents published as part of a website share navigational elements, rendering options, and visual style.
Website navigation can be provided through a global navbar, a sidebar with links, or a combination of both for sites that have multiple levels of content. You can also enable full text search for websites.
Quarto websites can be published to a wide variety of destinations including GitHub Pages, Netlify, RStudio Connect, or any other static hosting service or intranet web server. See the documentation on Publishing Websites for additional details.
Getting Started
To create a new website project, use the Quarto create-project command:
quarto create-project mysite --type websiteThis will create the scaffolding for a simple website in the mysite sub-directory. Here is what the _quarto.yml config file will look like for the site:
project:
  type: website

website:
  title: "mysite"
  navbar:
    background: primary
    left:
      - href: index.qmd
        text: Home
      - about.qmd

format:
  html:
    theme: cosmo
    css: styles.css
    toc: true
This will create the scaffolding for a simple website in the mysite sub-directory. To build and view the site use the preview command:
quarto preview mysiteThis will build the website and run a local web server to view it. To render (but not preview) the website into the _site directory:
quarto render mysiteBy default, all valid Quarto input files in the project directory will be included in the website (save for ones with a file or directory prefix of . or _).
See the Project Basics article to learn more about working with projects, including specifying an explicit list of files to render, as well as adding custom pre and post render scripts to your project.
VS Code
If you are using VS Code you can open a new workspace with your website project using the code command from within VS Code:
code mysiteRStudio
If you are using RStudio you can also create a Quarto website via the New Project command:
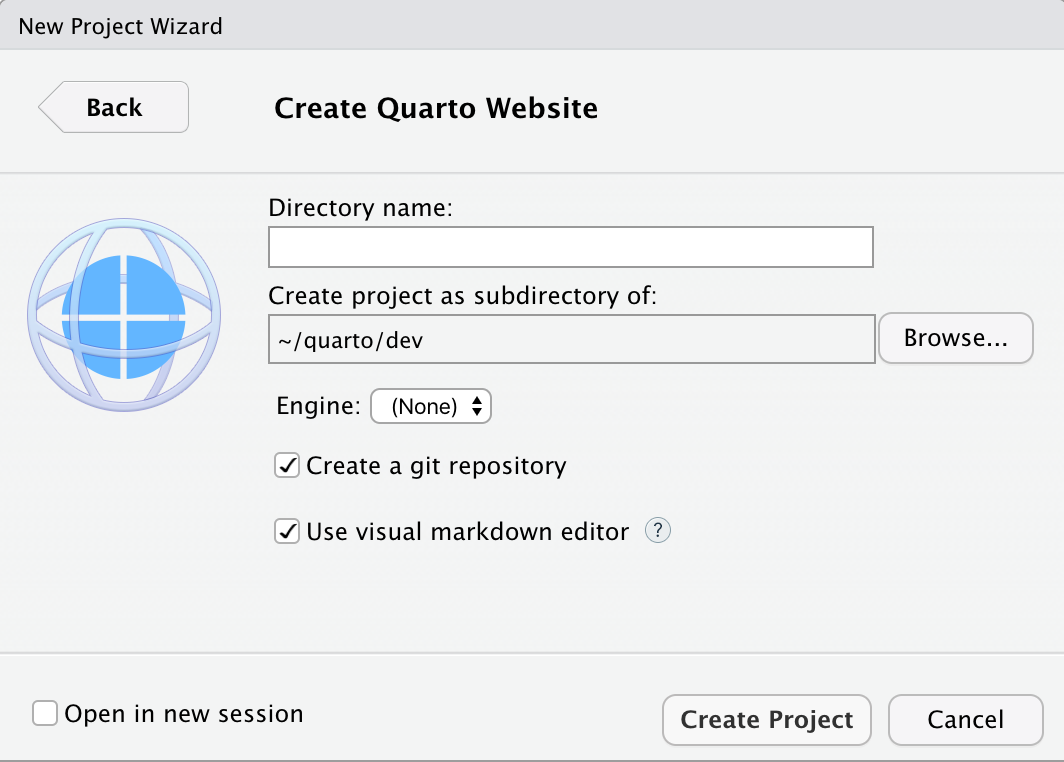
Render documents within the site using the Render command, render the entire site using the Render Site command on the Build tab.
Workflow
Quarto includes a live-reloading development server that you will likely find convenient to use while working on websites. Start the server with:
quarto previewThe development server will automatically re-render input files whenever they change.
Changes to configuration files (e.g. _quarto.yml) as well as site resources (e.g. theme or CSS files) will also cause an automatic refresh.
If you are using RStudio a site development server will be run automatically when you render a document or the site. You can also start the development server directly using the Serve Website command on the Build tab.
You can customize the behavior of the preview server (port, whether it opens a browser, etc.) using command line options or the _quarto.yml config file. See quarto preview help or the project file reference for additional details.
As you preview your site, pages will be rendered and updated. However, if you make changes to global options (e.g. _quarto.yml or included files) you need to fully re-render your site to have all of the changes reflected. Consequently, you should always fully quarto render your site before deploying it, even if you have already previewed changes to some pages with the preview server.
Render Targets
By default, all valid Quarto input files (.qmd, .ipynb, .md, .Rmd) in the project directory will be rendered, save for ones with a file or directory prefix of . (hidden files) or _ (typically used for non top-level files, e.g. ones included in other files).
If you don’t want to render all of the target documents in a project, or you wish to control the order of rendering more precisely, you can add a project: render: [files] entry to your project metadata. For example:
project:
  render:
    - section1.qmd
    - section2.qmd
Note that you can use wildcards when defining the render list. For example:
project:
  render:
    - section*.qmd
You can also use the prefix ! to ignore some paths in the render list. Note that in that case you need to start by specifying everything you do want to render. For example:
project:
  render:
    - "*.qmd"
    - "!ignored.qmd"
- "!ignored-dir/"If the name of your output file needs to start with . or _ (for instance _index.md for Hugo users), you must name the Quarto input file without the prefix (for instance index.qmd) and add an explicit output-file parameter in the YAML such as
---
output-file: _index.md
---
Linking
When creating links between pages in your site, you can provide the source file as the link target (rather than the .html file). You can also add hash identifiers (#) to the source file if you want to link to a particular section in the document. For example:
[about](about.qmd)
[about](about.qmd#section)
One benefit of using this style of link as opposed to targeting .html files directly is that if you at some point convert your site to a book the file-based links will automatically resolve to section links for formats that produce a single file (e.g. PDF or MS Word).
Learning More
Once you’ve got a basic website up and running check out these articles for various ways to enhance your site:
Website Navigation describes various ways to add navigation to a website, including top-level navigation bars, sidebars, or hybrid designs that uses both. This article also covers adding full-text search as well as a site-wide footer.
Website Tools covers adding social metadata (e.g. for Twitter Cards) and Google Analytics to your site, as well as enabling users to toggle between dark and light color schemes.
Website Options provides a comprehensive reference to all of the available website options.
Code Execution provides tips for optimizing the rendering of sites with large numbers of documents or expensive computations.
Publishing Websites enumerates the various options for publishing websites including GitHub Pages, Netlify, and RStudio Connect.